005 – Project loopduck 1
I don’t know if it was purely a case of GAS, or just the idea of trying something new, but after I read a few tests of thge loupedeck, the concept of using a Knobs and dials console to control my photo editing software invaded most of my brains. rrd
At first I thought how cool that would be to rotate the image or control the image with a dial instead of using a slider with the mouse. Then it came to me that operating dials for, say, contrast, sharpness, and many other frequent adjustments would be be great too.
However, Loupedeck is made for Lightroom, and is not too customizable (same for lightroom itself, acually). I’ve been using Capture since version 9 and never looked back. This piece of software is just amazing, and getting better and better which each version.
The extreme customization of its UI is really a major plus, that allows to really configure it to your own needs (or envy). Being able to assign each and every function to a shortcut key – and modify it- is key to such a project. Capture one allows to save sets of shortcuts if needed, which is actually luxury.
When the color balance tool came out, I was sold on the idea of finding something more physical to use it. Physical dials. And I also wanted to be able to do things differently than with my beloved mouse. Like adding layers, toggling rulers and grids, copying and pasting settings faster, etc…
So here I was, looking for a way to do so. Loupedeck was out. There was another piece of gear, called Palette, that was designed to do essentially the same thing and was more customizable. You could buy individual rotary or sliders, or buttons, customise them, physically assemble them the way you want. Interesting, nice and clever design. However, just a problem : money.
The palette gear were very expensive. very. I understand the R&D thing, design costs, marketing, etc… But it was way to expensive for what would essentially be a comfort gear. Another consequence of the steep price was that users were limited to a few pieces of gear, therefore confronted to choosing which features would be controlled by palettes.
I may have a decision making problem, but I did not want to pick just a few features and keep using the mouse or keyboard for the rest. This, to my opinion, would cancel most of the advantages of using that type of gear.
Palette is now called Monogram Creative Console, and it looks like it is still (or will be, as the kits are due in may 2020) very expensive. $430 for th studio set with 6 dials, 1 orbiter (a big dial) and 3 pads, and $720 for the master console with 9 dials, 3 orbiters, and 6 buttons. Better get a lens with that money than getting such kits. But that’s just me. The design is great.
So Loupedeck was out and Palette was out. I was on my own. Being quite stubborn, I went to see my omniscient friend Google, and he came out with references about a few interesing experiments.
Among them was the great work of an anonymous person. This person is an explorer, and the website is very well made. As soon as I read the post, I knew I was in. He or she did exactly what I wanted to do, so, most of the research, reflexion, and trials needed were done. Best of all, he shared it all in a clear and understandable manner, and for free. My natural level of misanthropy was suddenly lowered and it felt good.
So, thank you for sharing this, His or her site is here.
Then Came the time to start cooking.
For 1 person.
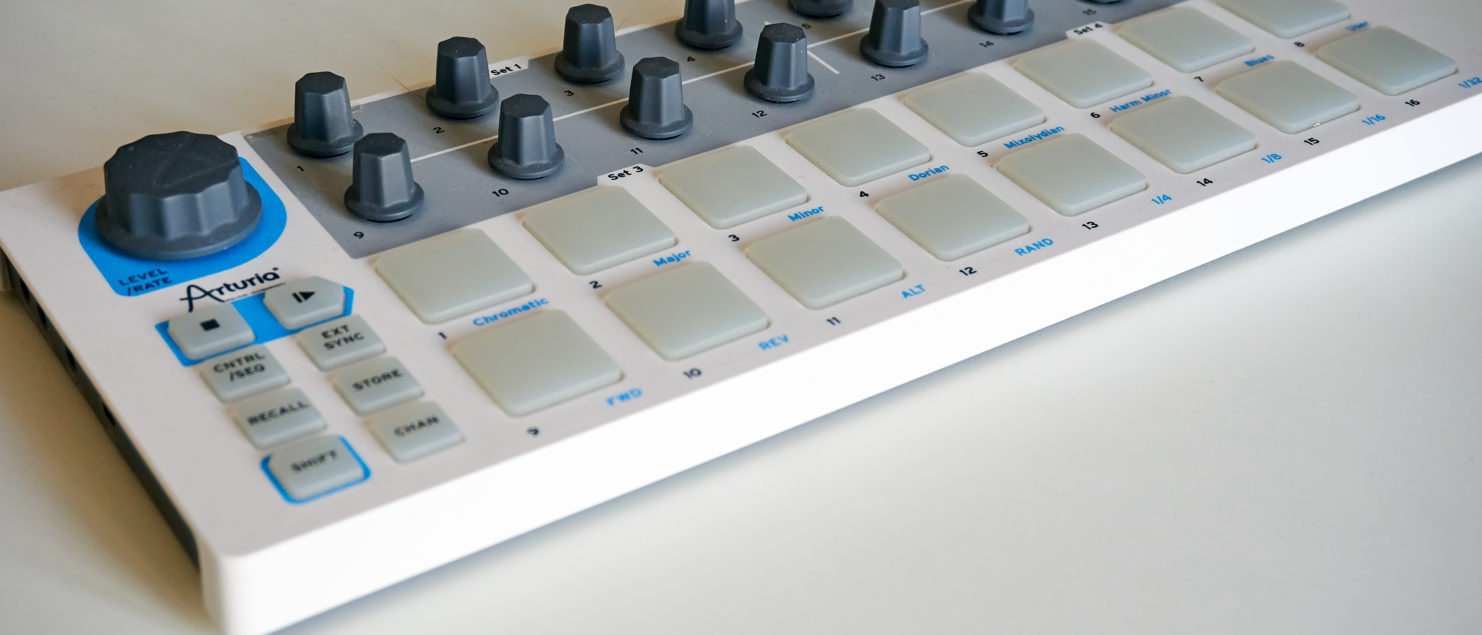
- 1 Midi console – Arturia beatstep is perfectly fit for the purpose
- 1 midi translator software for my computer
- some planning
- Time. Setting up the whole damn thing is time consuming.
You can find the beatstep for 85 euros in Belgium (available in both white and black) , and the bome midi translator software costs 59 euros. So the total cost of the device is 140 euros.
For this, we have 16 rotary dials, which allow (with a little trick) 32 different rotary controlled features. It also has 16 pads, which aloso allow 30 different button triggered actions. As a Bonus , we have the giant rotary wheel, allowing to control 2 more features, and another button allowing 2 more actions. Definitely enough (unless….. but that’s another story we’ll see on part 2).
Now came the time to think. the questions I had to answer were :
- Which features of capture one do I want to control with the beatstep?
- Is there a shortcut key for this in capture one?
- Which dial or pad will it be assigned on the beatstep?
And now let’s get our hands dirty!.
First, adapt and create all the shortcut keys in Capture one. This is definitely the most time consuming part of he project, and chances are you end up with crazy key combinations to avoid already existing shortcuts. The capture one shorcut list (printable) is of great help for this process.
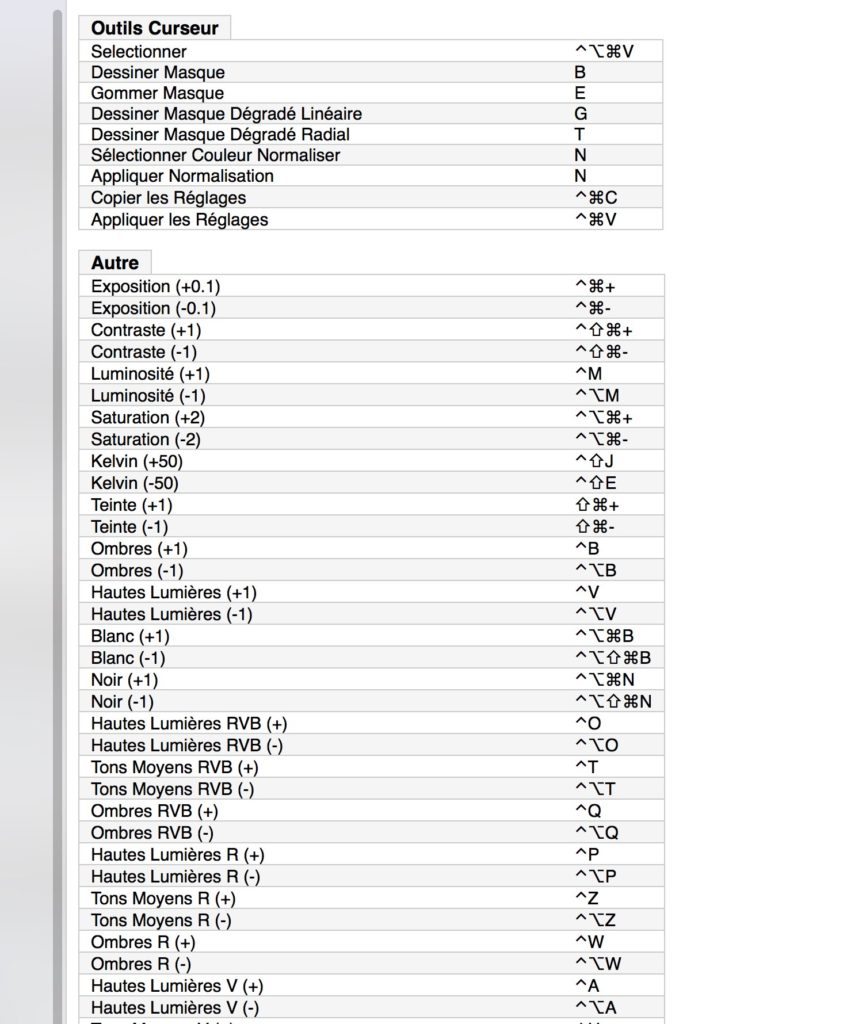
Then you have to configure the beatstep with the included software.
Quite straightforward.
The most important part is to assign the correct CC number to each dial and button, as this will be “the sender” of the message to the midi translator software. Each dial or button has one and one only CC, even if you control 2 different features with it (you do this by simulating a shift key, as we’ll see later).
Each of the rotary dials must be configured to transmit a value if you turn the button one notch to the left, and another value if you turn it to the right. The settings are as follows
Mode : Control
CC number : your choice
Option : Relative 1
Channel : 1
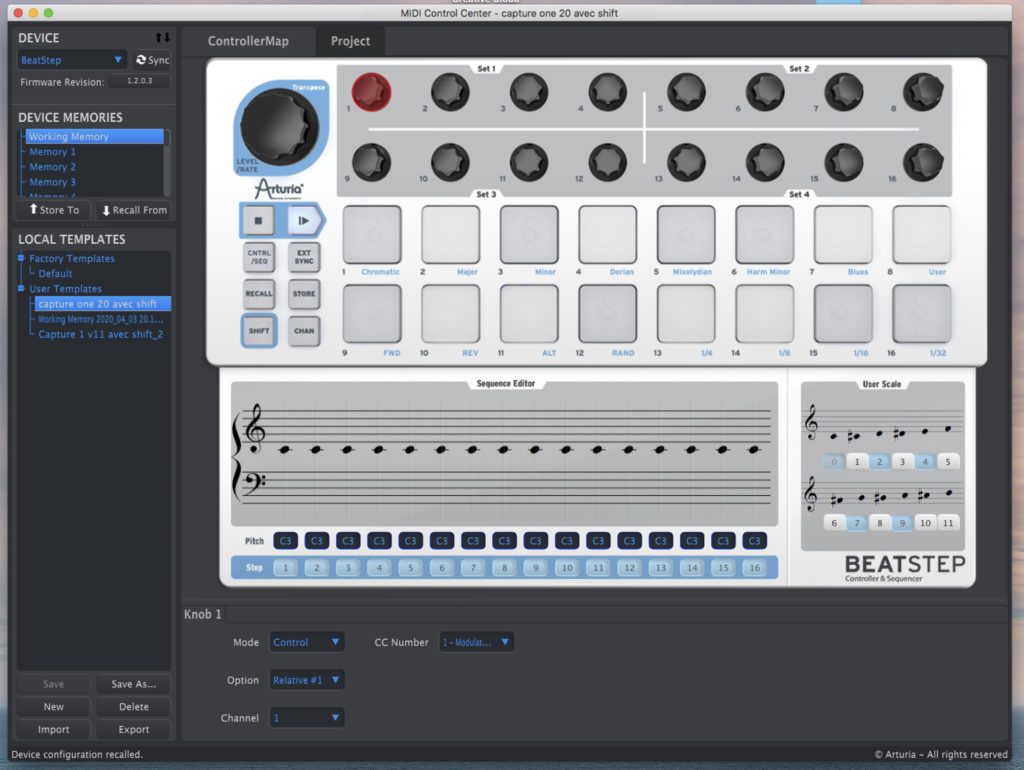
Next come the pads. About the same thing except that the number transmitted will be different. Parameters are as follows
Mode : Switched
Option : gate
Channel 1
CC number : your choice
Off Value (you don’t push the pad) : 0
On Value (you hit the pad) : 1
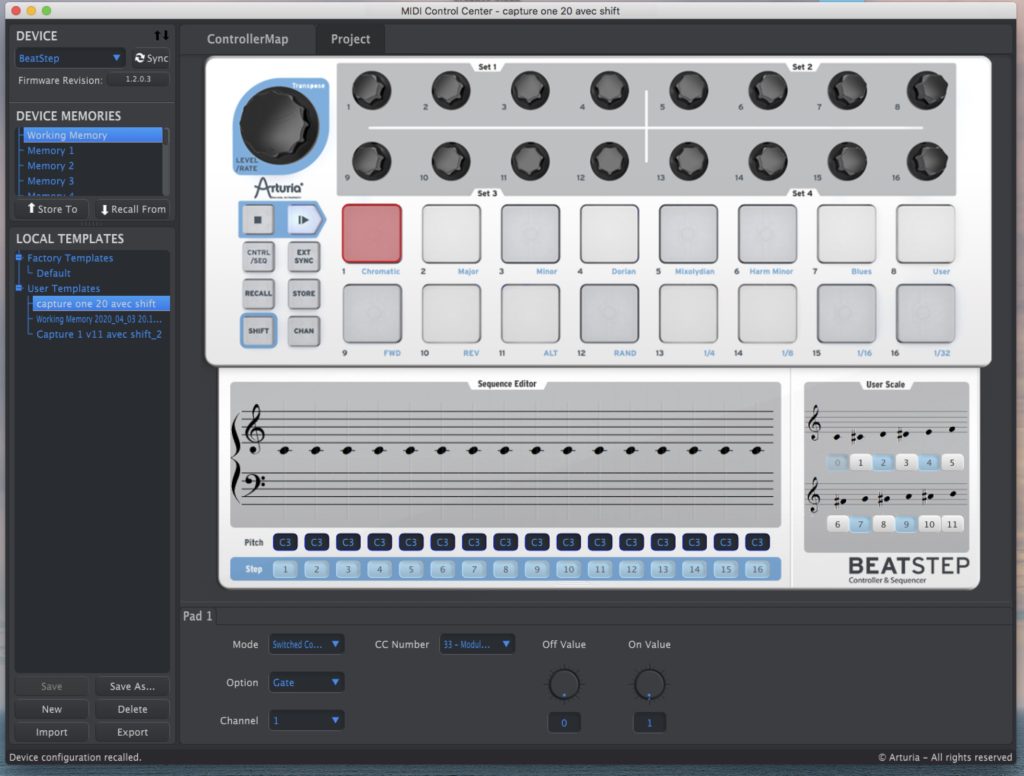
That’s it. Once done, you can save the settings as a template (left part of the image), so you can come back, troubleshoot, edit, or experiment.
Download the parameters in the Beatstep and take the next step.
At this point, I chose to emulate a shift key with one of the pad, so that I can double the functions of each dial and pad. For example, with Capture one 20, i’m able to set both HDR higlights and Whites with the same dial. so easy.
I chose the number 9 pad on the beatstep to be the shift key.
Once done, it is time to fill in the dictionnary in the bome translator.
Launch the software and comes the tedious part to link each CC number with an action the software will perform when it receives a midi signal.
The software is also really well made and allows to organise everything clearly.
On the left are the presets I created. I find this easier to edit later on if needed. I chose to create one preset for the pads, one for the dial, and one for the shift key.
On the right, you can write a clear description of the “translation” (since usually, you seldom need to change it, it makes things easier to remember the use of each CC after a long period).
then you have the incoming message from the beatstep : That’s where you enter the CC number you assigned to the pad in the configuration software.
Follows the rules section, where you can apply rules to the translation, and even ignore it and bypass the output action.
I used this to set up my shift key.
Bome midi translator allows the assignment and use of variable, which is great. I entered the following rules in the “shift keys beatstep ” preset.

- ga=1 if the pad is pressed (shift on)
- ga=0 if the pad is not pressed (normal state)
The pad behaves like a real shift key, the variable is set to 1 until the pad is released, then it sends a 0 message, changing the variable GA to 0.
therefore the trick is, for each translation, to apply the following rules :
if ga==1 then exit rules, skip outgoing action” for the non-shift function, or “if ga==0 then exit rules, skip outgoing action” for the shift function.
The last section is what the translator will do, basically in my case which keys to type. You just have to select the field, and type the shortcut with your keyboard. piece of cake.
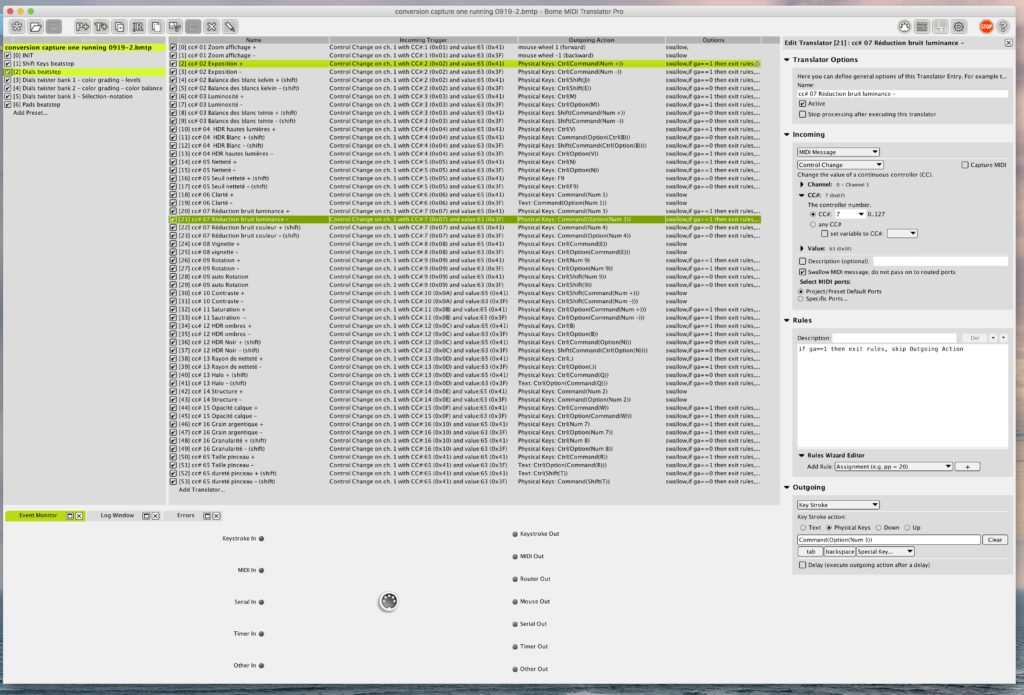
Don’t forget to save often 🙂
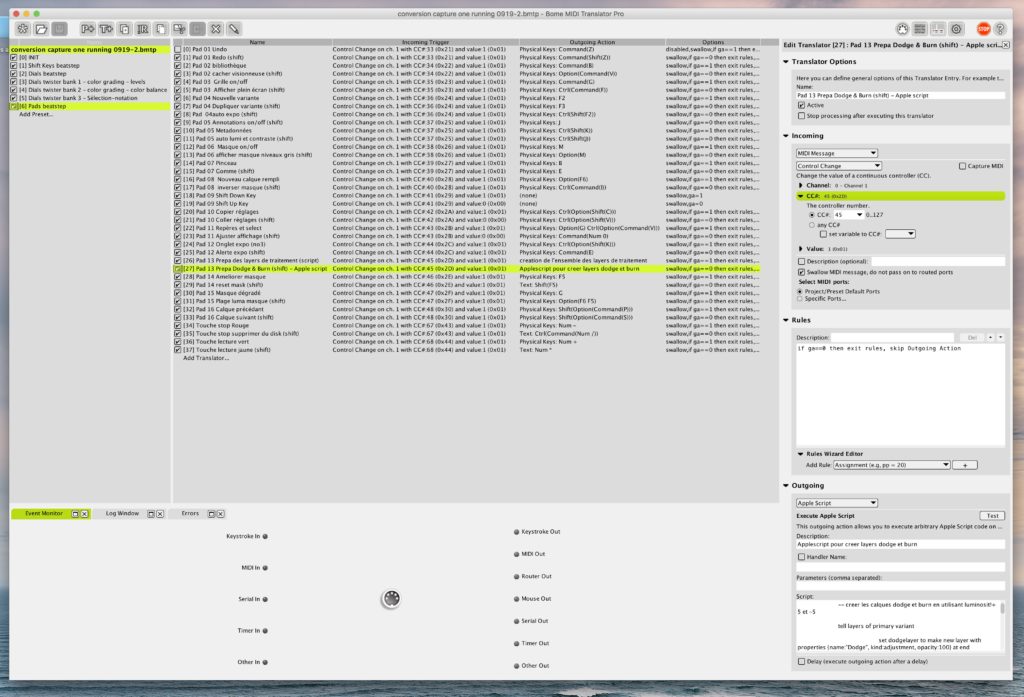
Instead of keystrokes, I use a couple of pads to start an applescript within capture one. For example, for dodging and burning, I use 2 layers, surprisingly called “dodge” and “burn”, and use sometimes exposure, sometimes luminosity. I assigned a script to a pad, so that with just one button touch, I automatically have 2 layers created, with an empty mask, adequately named, with parameters set, and I am ready to brush on my tablet.
I use another one that creates layers that correspond to categories of retouching, and that follow the tabs I set in Capture one (exposure, colors, details, geometry, effects). I then work on each type of retouching on a different layer, adequately named.
I’m lazy, and creating and naming layers with just one touch is a blessing.
Of course, this could be done with presets and all, but scripts do the job perfectly and I can assign a pad to this.
For instance, the first dodge and burn script is :
tell application “Capture One 20”
tell layers of primary variant
set dodgelayer to make new layer with properties {name:”Dodge”, kind:adjustment, opacity:100} at end
end tell
tell adjustments of dodgelayer
set brightness to 5
end tell
tell layers of primary variant
set burnlayer to make new layer with properties {name:”Burn”, kind:adjustment, opacity:100} at end
end tell
tell adjustments of burnlayer
set brightness to -5
end tell
end tell
I have to confess, I do not know anything about applescript, and Capture one is not very helpful for that matter. Everything can be scripted, but there really is no help or examples, so for a novice, it’s nearly impossible.
I found some C1 scripts on the internet and finally gathered enough information to be able to adapt them to my needs, but it’s been tough, and scripting is a path I don’t want to take. All I wanted was to be able to create and name layers, and set a few parameters. Done
Technically, at this point, you’re good to go. It’s just a matter testing and trouble shooting.
However, I’m over 50 and my memory is not what it used to be, and it’s hard to remember what function every pad and dial trigger.
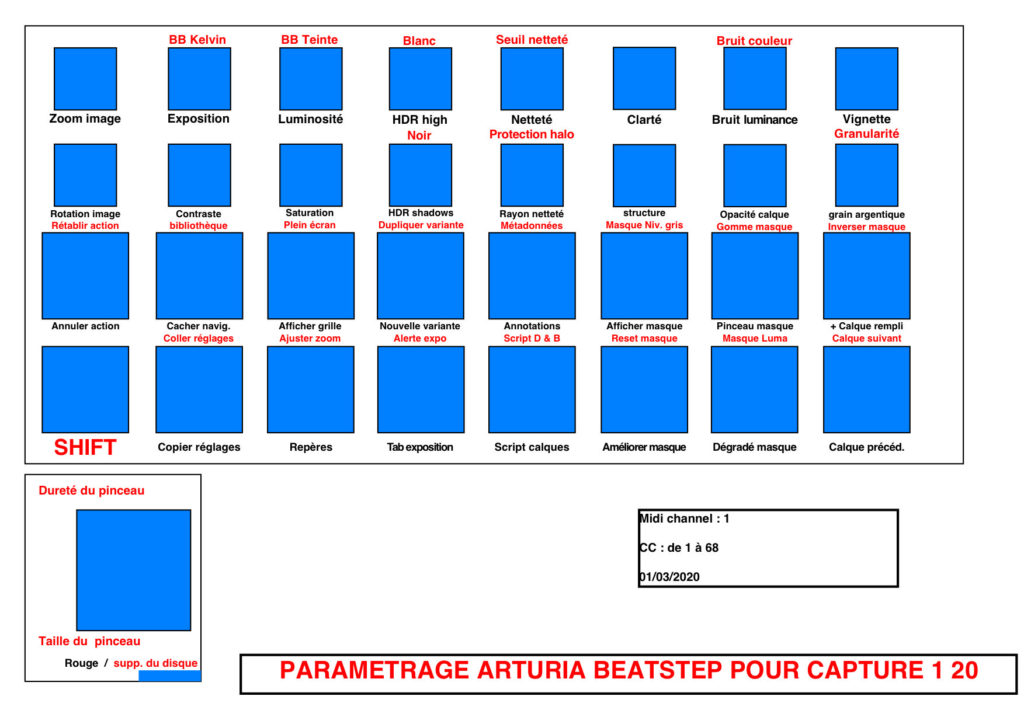
For this reason (and to make it nicer to look at), I came up with a template to print, cut, and put on the beatstep.
The template looks like this :
For this, I took measurments of the beatstep, and built the template with a great software called Swift Publisher. I use this software a lot for everyday needs. It’s not Indesign all right, but fills all my needs, without the headaches (and price) of Adobe software. Here is a downloadable PDF version of the template.
post005-template-arturia-beatstep.pdf
If you want the swift publisher document, just ask me and I’ll email it to you.
Once printed, another chore awaits …..
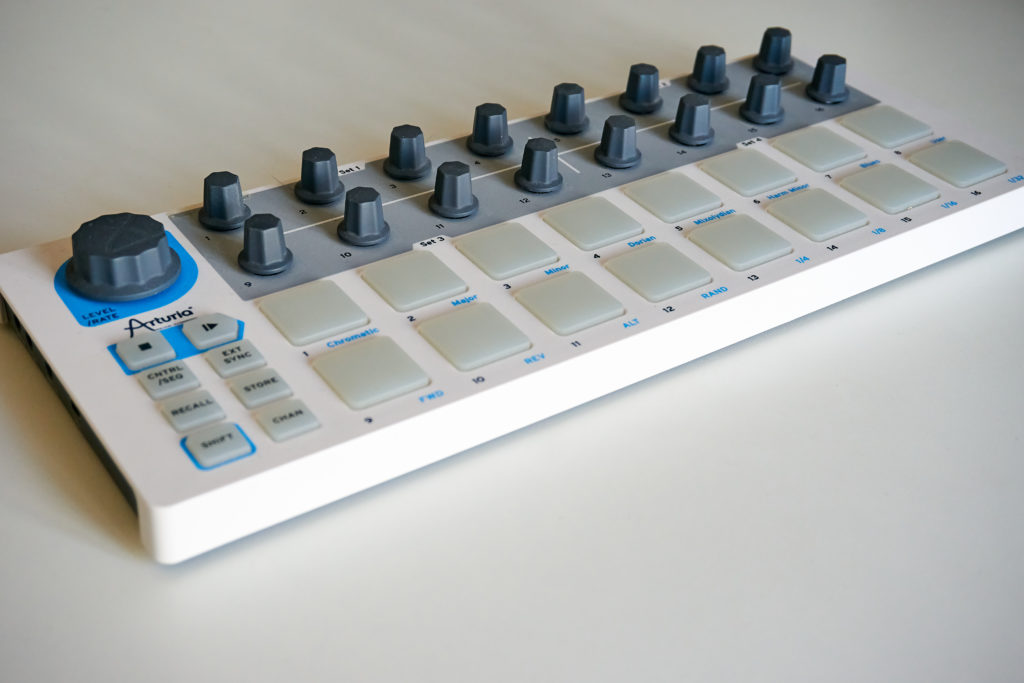
The final results looks like this
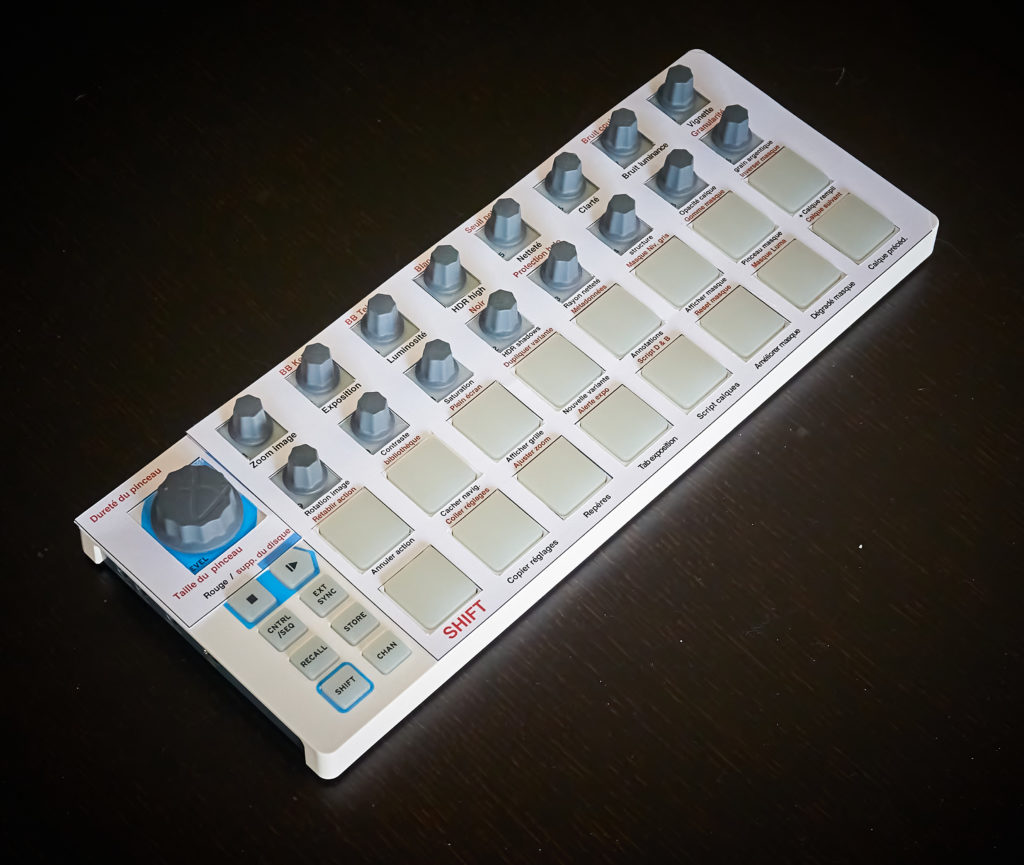
All in all, it cost me was 140 euros and some time, making this project a good value investment that will last a long time, as it is so easy to edit with evry new version of Capture one. My thanks go to phase one for producing such a brilliant software.
Thanks for reading through. Feel free to comment.
